
Retail Edit Product |

|

|

|
|
Retail Edit Product |
|
|

|
Retail Edit Product |
|
|
|
|
Retail Edit Product |
|
|
|
The Retail Products list allows you to enter the products you sell or use as Back Bar items.
![]()
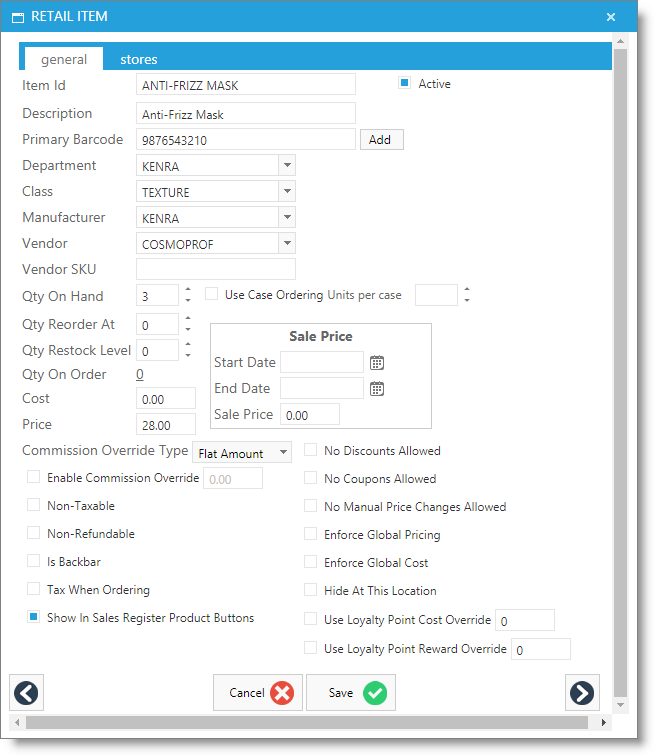
Item Id
The Item Id is how you will most often refer to a item within the software. Typically it is the name of the product or an abbreviation of the name. You will want the Item Id to be unique and meaningful to help avoid any confusion. This is how items can be located on the sales register if using Item ID.
Item Id Tips:
Size: If you sell different sizes or types of an item, you should also enter the size or type of the item in this field. A separate item record should be created for each size or type.
Abbreviated Name or Acronym: You may also abbreviate the name of the product in this field. If you choose to abbreviate the name or enter an acronym, make sure that it is a name or acronym that everyone who will be using the Appointment Calendar and Point Of Sale screen will be able to remember when searching for the item.
Abbreviated Name of Manufacturer: You can also enter an abbreviation of the name of the manufacturer at the beginning of the "Item Id" so that it is easier to search for all items made by that manufacturer. If the name of the manufacturer is at the beginning of the name, all of the items from this manufacturer will be displayed next to each other when searching for an item. |
Active
The "Active" check-box should be checked if this is an item that you would like to be available for sale. If you decide to discontinue this item, this check-box should be unchecked. Once they are inactive they will no longer show up at the point of sale but they will show up on reports. You can reactivate an item at any time.
Description
Enter the plain language description you wish here. The name you enter here is what will be displayed on the Inventory List and printed on Receipts, Purchase Orders, and Reports. You may enter exactly what you entered in the "Item Id" field or you may enter a longer more descriptive name here. You may also enter the description provided by the vendor or manufacturer.
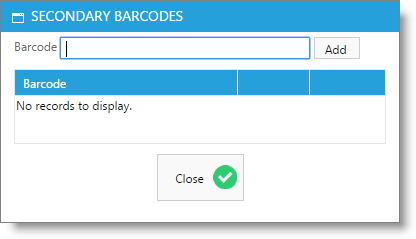
Barcode
If you have a barcode reader connected to your computer, you may scan the UPC code on the product and the code will be entered here automatically. This will allow you to look up items in the point of sale by their barcode numbers. You may have more than one barcode for a single item.
Department
The Department field is available to organize your items into groups or categories. Inventory Departments are shared for both retail and service items.
Class
Class is an additional way to organize your items. In many cases it can be used as a sub-category for the department. Classes are shared between retail and services.
Manufacturer
The Manufacturer will help the user identify who makes a specific product.
Vendor
The Vendor field is used to designate who you purchase this product from. If you do not select a vendor then you will not be able to use the AutoFill options when creating a purchase order.
Vendor SKU
The SKU (Store-Keeping Unit) is an identifier assigned by the vendor or manufacturer. This field is not necessary for creating a purchase order, though in some cases your vendor may require it.
Qty On Hand
The Qty On Hand refers to the number of a product that you have available at your business.
Use Case Ordering
Check this box if you order this item by the case. If checked, you should enter the number of this item that comes in a case in the field to the right.
Qty Reorder At
Enter the quantity you wish to reach before you need to reorder this product. This can be used as the minimum or the maximum of this product. A quantity is necessary for the "Autofill" feature of Envision Cloud's Purchase Orders.
• Reorder At - Minimum Quantity
To use the "Reorder At" as the minimum, you will need to enter the minimum quantity that you would like to keep on hand for this product into the "Reorder At" field and enter how many you would like to order when you get down to the minimum quantity into the "Qty Restock Level" field. By doing this, the program will automatically reorder the quantity specified, when you have reached the minimum quantity and when you create a Purchase Order in Envision Cloud. For example, if your minimum of a product is 3 and you would like to order 3 more when you have reached the minimum, you would enter a quantity of 3 into the "Reorder At" field and a quantity of 3 into the "Qty Restock Level" field.
You may leave the Restock Level set to zero if you would like to order the difference between the On Hand and Reorder At, however it will only add this product to a Purchase Order when the item has fallen BELOW the Reorder At amount. So, if you set the Reorder At as the minimum, it will not order this item until it has fallen below the minimum. If you decide to do this, you may want to make the minimum quantity slightly larger so that you do not fall below your minimum.
• Reorder At - Maximum Quantity
To use the "Reorder At" as the maximum, you will need to enter the maximum quantity that you would like to keep on hand for this product into the "Reorder At" field and leave the "Qty Restock Level" set at zero. By doing this, the program will automatically reorder the difference between the On Hand and the Reorder At quantities, when a Purchase Order is created in Envision. For example, if your maximum of a product is 5, you would enter a quantity of 5 into the "Reorder At" field and leave the "Qty Restock Level" set to zero. If the current "Qty On Hand" amount is 2, the "Reorder At" is 5 and the "Order Level" is zero, the program will automatically order 3 of this item when a Purchase Order is created. |
Qty Restock Level
Qty Restock Level is the number of items that will be ordered when your Qty Reorder At is reached. If you leave this at zero then the AutoFill based on inventory levels inside a purchase order will order the difference between the Qty Reorder At and the Qty On Hand amount.
Cost
This is your cost per unit and the amount that you pay when this product is purchased from your vendor.
Price
Price is the amount paid at the point of sale by the customer for this item. Leave the Price blank if this item is strictly for Backbar use.
Sale Price
The Sale Price can be used if you are running a promotion on the item or if it is on sale. Enter a "Sale Price", then select the "Sale Starts" and "Sale Ends" dates by using the small drop down arrows to display a calendar. You may also enter the dates directly by typing them into the fields provided. The Sale Price you set will only be effective for the range of dates selected. After the "Sale Ends" date is passed, the price will automatically revert to its normal price.
Enable Commission Override
If you would like to override the amount of commission an employee is paid for selling this product, check the "Enable Commission Override" box and enter a dollar amount in the field. This will override any commission percentages you have setup in your commission plans.
Non-Taxable
Checking the Non-Taxable check-box will make this item ignore the current tax settings and never charge tax for this service at the point of sale. If you do not have Service Tax enabled in your Company Settings then you do not need to check the non-taxable box.
Non-Refundable
Checking the Non-Refundable check-box will not allow this item to be returned at the point of sale.
Check this box if this item is never for sale to clients, but used to run your business. For example, Color Products (Professional Products), Robes, and Slippers. Backbar items are color coded blue in the retail item list.
Tax When Ordering
Checking the Tax When Ordering check-box will cause tax to be calculated for each of these items when creating a purchase order.
Show In Sales Register Product Buttons
Deselecting this option will not allow this item to show as a button in the sales register. By default, this is checked to show the item.
Show Under Plan in Treatment Screen
Check this box to have this item show as a checkbox option under the Plan section in the Edit Treatment screen.
No Discounts
Select the checkbox to not allow discounts to be applied to this item in the Sales Register.
No Coupons
Select the checkbox to not allow coupons to be applied to this item in the Sales Register.
No Manual Price Changes
Selecting this box will not allow the item price to be changed by typing in a new price for it in the sales register.
Enforce Global Pricing
Select this option to set the price of this item to be the same between all locations. This is only used in businesses with multiple locations.
Enforce Global Cost
Check this box to set the item cost the same at all locations. This is only used in businesses with multiple locations.
Hide At This Location
Check this box to not have this item show available for sale at a single location. This is only used in businesses with multiple locations.
Loyalty Cost Override
If you want to change the number of loyalty points that a client needs to redeem for this product, you may choose to check the box and enter an override number of loyalty points for clients to redeem in order to receive this item for free. This will override the standard number of loyalty points to redeem as set in your Loyalty Program.
Loyalty Reward Override
If you want the purchase of this item to not award the standard number of loyalty points as set in your Loyalty Program, you may choose to check the box and enter an override number of loyalty points for clients to earn when they purchase.
