Step by Step Online Booking Setup |

|

|

|
|
Step by Step Online Booking Setup |
|
|

|
Step by Step Online Booking Setup |
|
|
|
|
Step by Step Online Booking Setup |
|
|
|
This guide will instruct you in the set up and customization of your Online Booking page, setting up employees and services for online booking, and how clients use the online booking feature. Online Booking will give your current and potential clients the ability to book services with you and your staff via online.
To begin, go to your Online Booking settings. Go to the Company Settings and select the Online Booking tab.
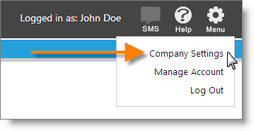

1. Set up your URL name. Enable Online Booking.
You will at the very top where you can enter a name for your URL. The URL is the name you'll be assigning to your Online Booking page. For example if you enter “Hair Salon” your URL will be Envisiongo.com/a/hairsalon
Important Note: Once you select a URL name, you CANNOT change it later. Please verify the spelling of your selected URL name before registering your URL. |
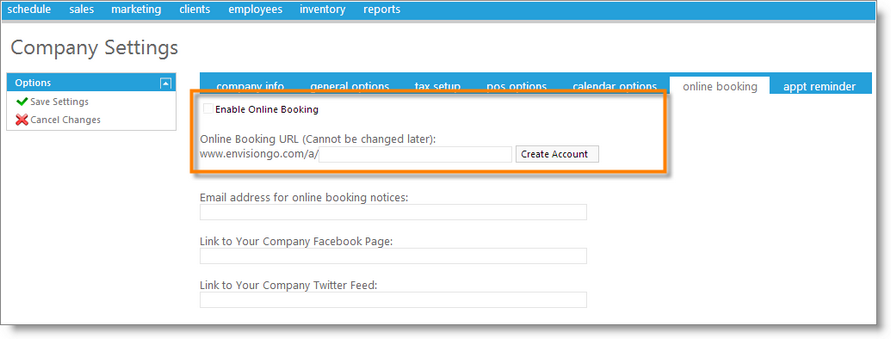
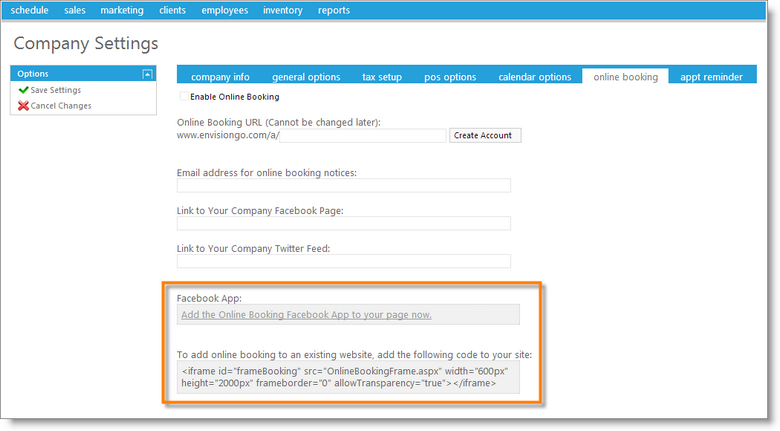
2. Customize your web page.
After choosing a URL, you will begin to customize your web page with the given fields.
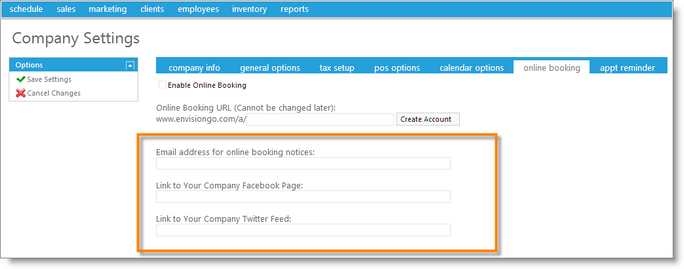
Email address for online booking notices
By default, the email that is displays on your web page for clients to contact is the email used under the General tab in the Company Settings. If you wish for an alternate email to display on your page, enter it in this field.
Linking Facebook/Twitter
You can link your Facebook Page and Twitter feed. Enter the links into the fields, these will create ICONS for clients to click on to direct them to your social media sources.
Facebook App
You can add an app to your Facebook business page that will allow clients to book directly from your Facebook page. Follow the steps given once this option is selected.
Existing Website
If you have an existing website, use the provided iFrame code to integrate online booking to your existing website.
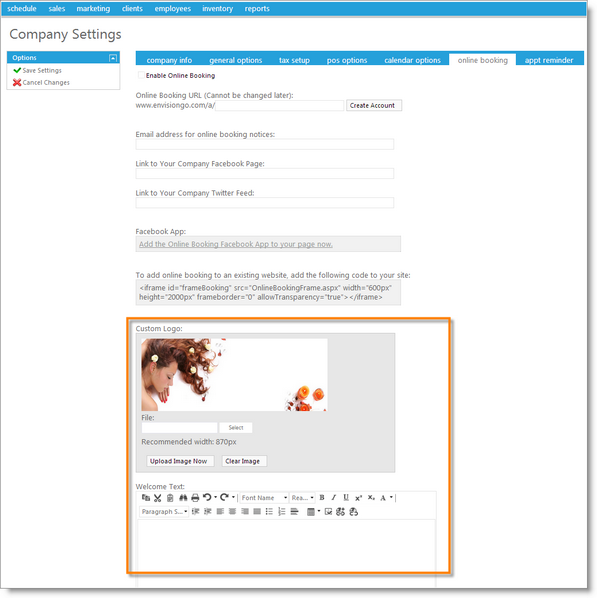
Custom Logo
Upload your own personalized banner to display on your web page. The recommended width is 870 pixels.
Welcome Text
You can create and customize your own welcome text that will display on the front page. This is a good area to describe your business, announce specials, promote events, and advertise any important information about your business.
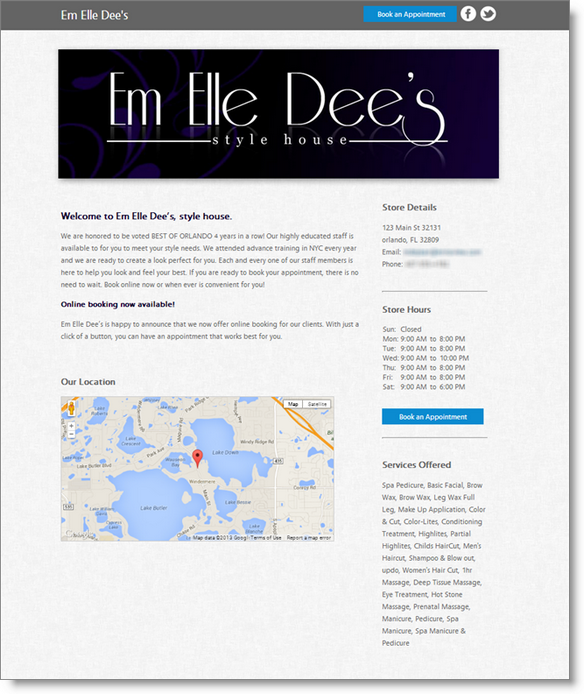
Once you have entered all the information, click save on the right side of the screen to store your settings. Your web page will look similar to the picture below. Your store hours, address information, and services offered will all be loaded from your Envision Cloud database for you. You can control which employees and services are available for online booking.
3. Setting up Services and Employees for Online Booking.
To set up Employees for Online Booking:
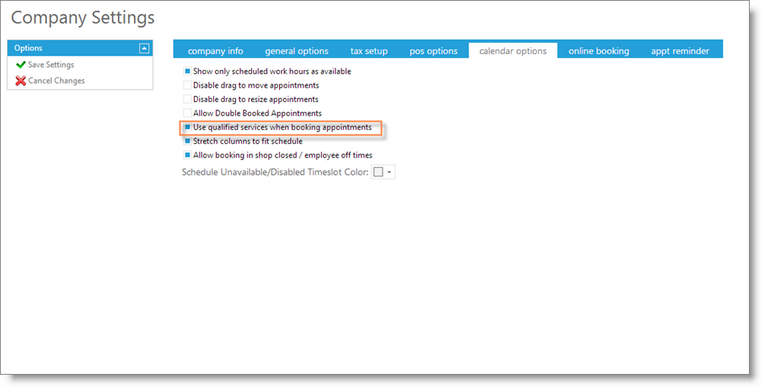
Go to the Company Settings and select the Calendar Options. Select the option "Use qualified service when booking appointments". Save the setting.
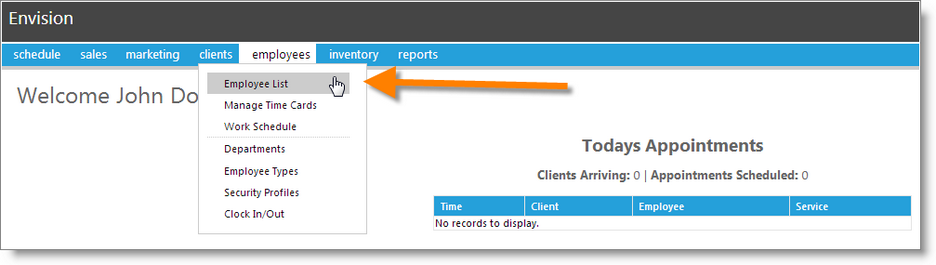
Go to Employees in the tool bar and select Employee list.
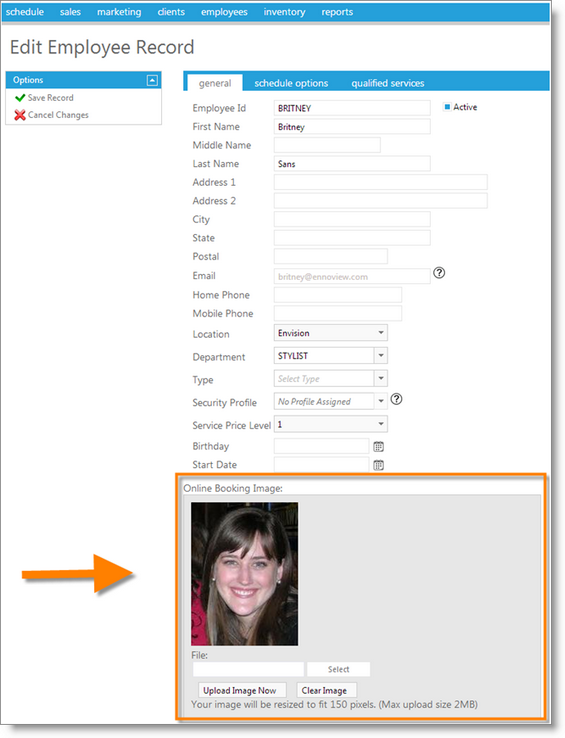
Select an employee. In the General tab at the very bottom there is an area where you can upload an employee image to be displayed to your clients during their booking process. This is optional.
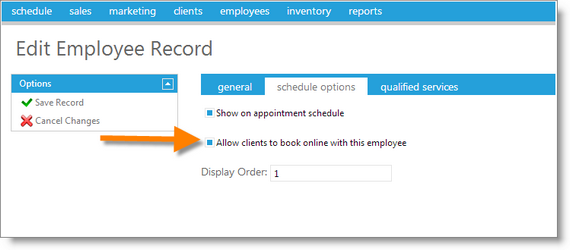
By default, employees are automatically available for online booking. If there is an employee that should not be available for clients to book with online, select the Schedule Options tab and un-check Allow clients to book online with this employee.
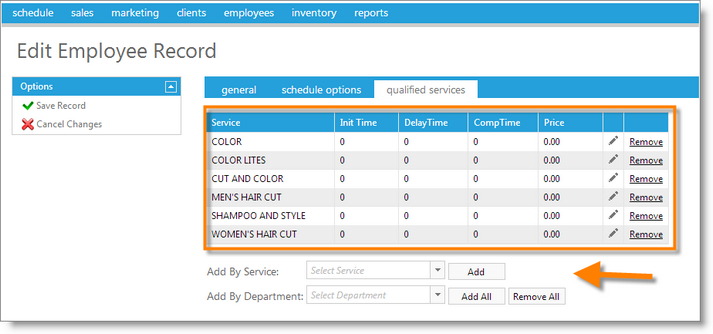
To make sure that clients can only book services that employees are qualified to perform, be sure to assign services under the Qualified Services tab.
To set up Services for Online Booking:
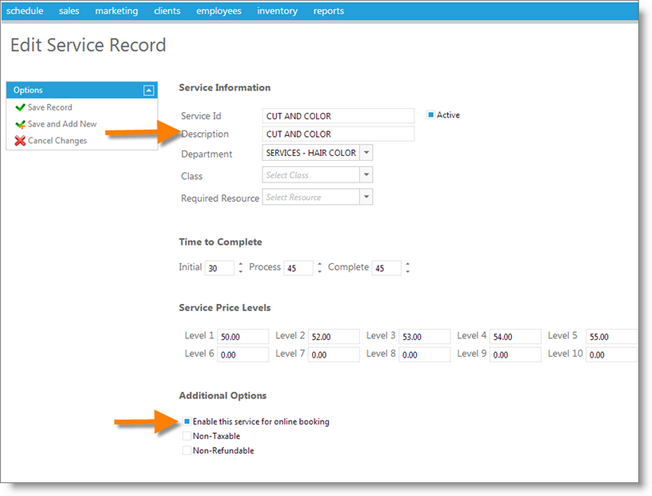
Go to Inventory in the tool bar and select Service list.
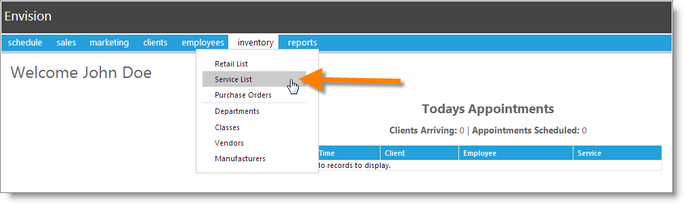
Select a service. Make sure that the Description Field is filled with a service name that you wish to display to clients. Services are set by default to be available for Online Booking. If you wish to disable a service from being booked online, uncheck Enable This Service for Online Booking.
This completes the set up of your Online Booking page. You can provide this web page to your clients to book appointments online with your business.
How a Client Books Online
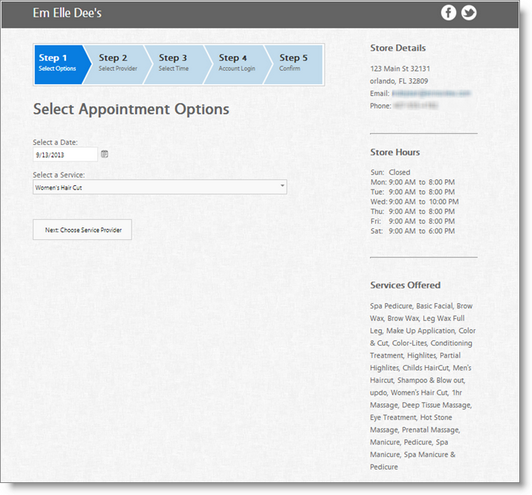
Step 1: The client chooses what service they wish to book and which date they want to book the appointment.
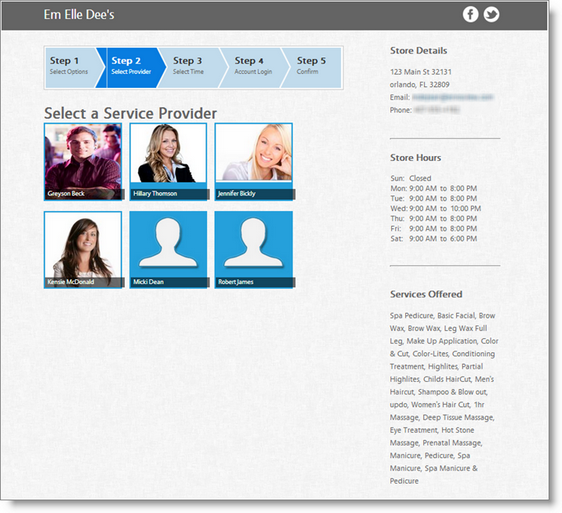
Step 2: The client selects which service provider they want to book with.
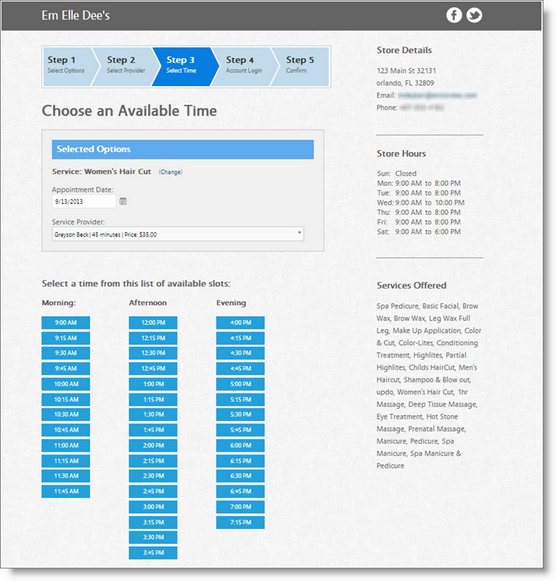
Step 3: The client will select from the list of available times on their selected date. If they choose, they can change their date, service, or service provider selections.
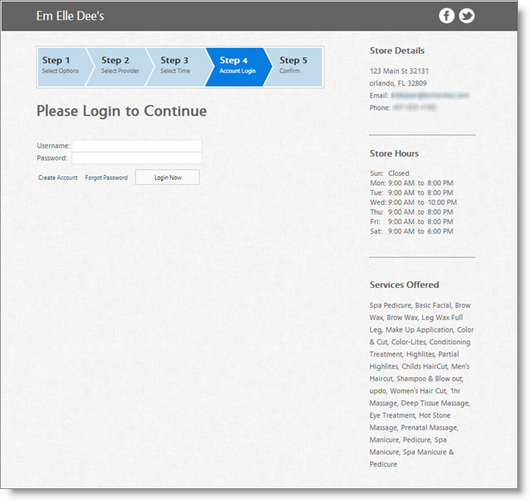
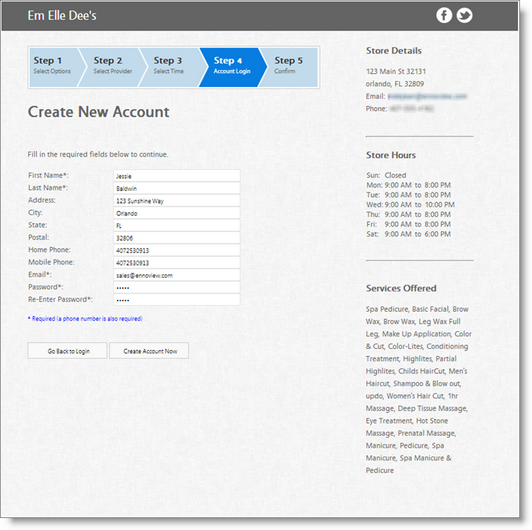
Step 4: The client signs into their account. If they haven’t previously booked online, they’ll go through the process of creating an account. The information collected will be stored in your client database.
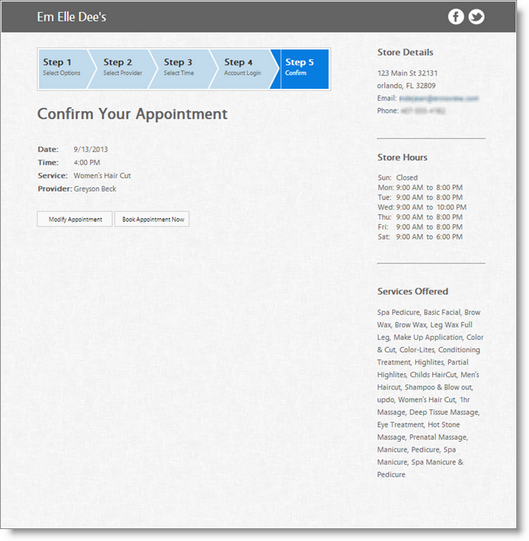
Step 5: The client will be asked to confirm the appointment. This is their final step.
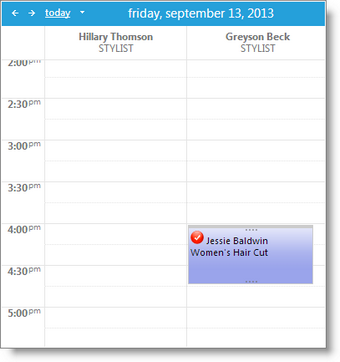
When a client submits an appointment successfully, you will see an appointment will appear on your calendar. The Red Check-mark icon indicates that the appointment was booked online.