
Checking a Client Out |

|

|

|
|
Checking a Client Out |
|
|

|
Checking a Client Out |
|
|
|
|
Checking a Client Out |
|
|
|
The POS Check Out feature transfers services from the Appointment Calendar to the Point of Sale screen. You can run this process several times on the same client if you add services to the calendar during their visit.
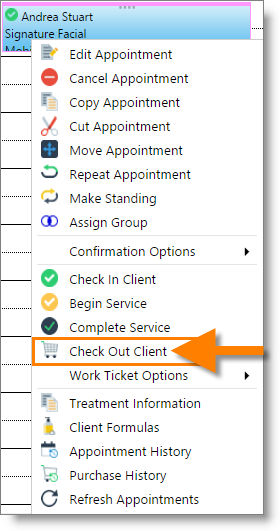
1. Right-click on top of one of the client's appointments. Select "CHECK OUT CLIENT" from the menu.
2. The services will be transferred to the Sales Register. Verify that you are checking out the correct client by verifying the client's name at the top of screen.
3. Review the information on the ticket and add any additional products or services that the client is purchasing. Make any changes needed or apply discounts.
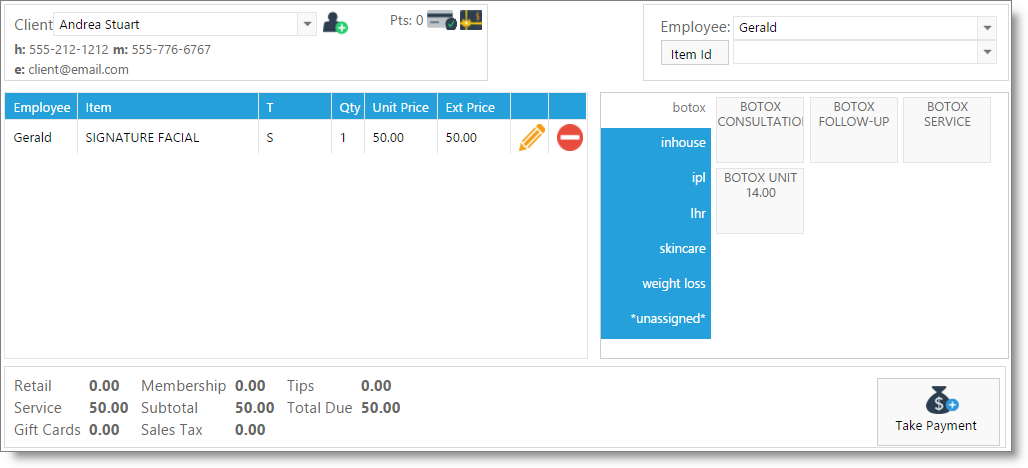
5. Click the "Take Payment" button in the lower right hand corner of the screen.
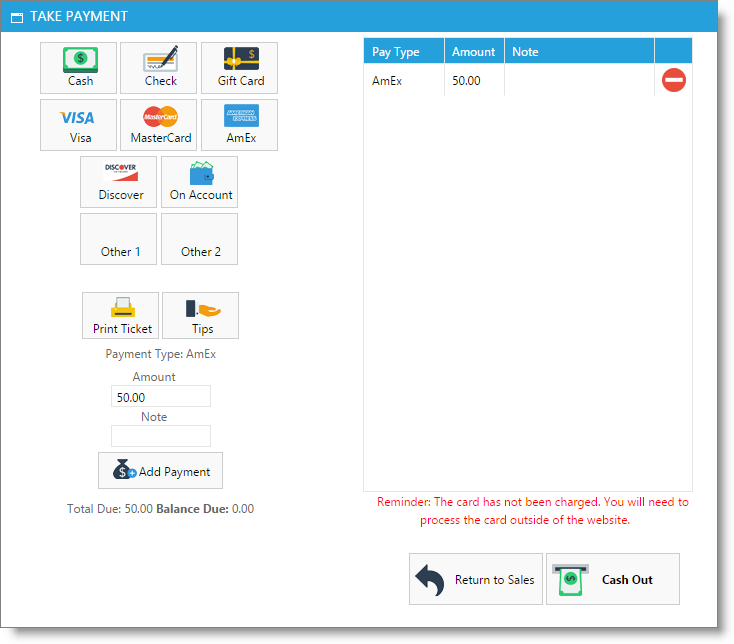
6. Enter Tips, if desired.
7. On the Take Payment Panel, select the type of payment that the client will be using. Enter the amount and select "Add Payment".
Credit Card Processing Instructions: Please refer to the "Credit Card Processing" Instructions if you are using Envision Cloud's integrated credit card processing.
Enter Tips: Please refer to the "Entering Tips" instructions. |
7. Click the "Cash Out" button to complete and save the transaction.
